Lab: Intro to Asynchronous Serial Communications
In this lab I took a closer look at asynchronous serial communication between an Arduino and a computer. This type of digital communication makes use of serial transmit (TX) and receive (RX) over IO ports to communicate at a set data rate.
The lab demonstrated that there are a number of ways for an Arduino to transmit data, including ASCII (alpha numeric characters) and binary code. Also the lab demonstrated that there are many methods to access the serial port on a computer outside of the Arduino serial monitor and serial plotter functions.
Using the Terminal application on my mac I made a serial connection to my Nano 33 IoT and was able to display the IMU (Inertial Measurement Unit) data that I set it to print over serial.
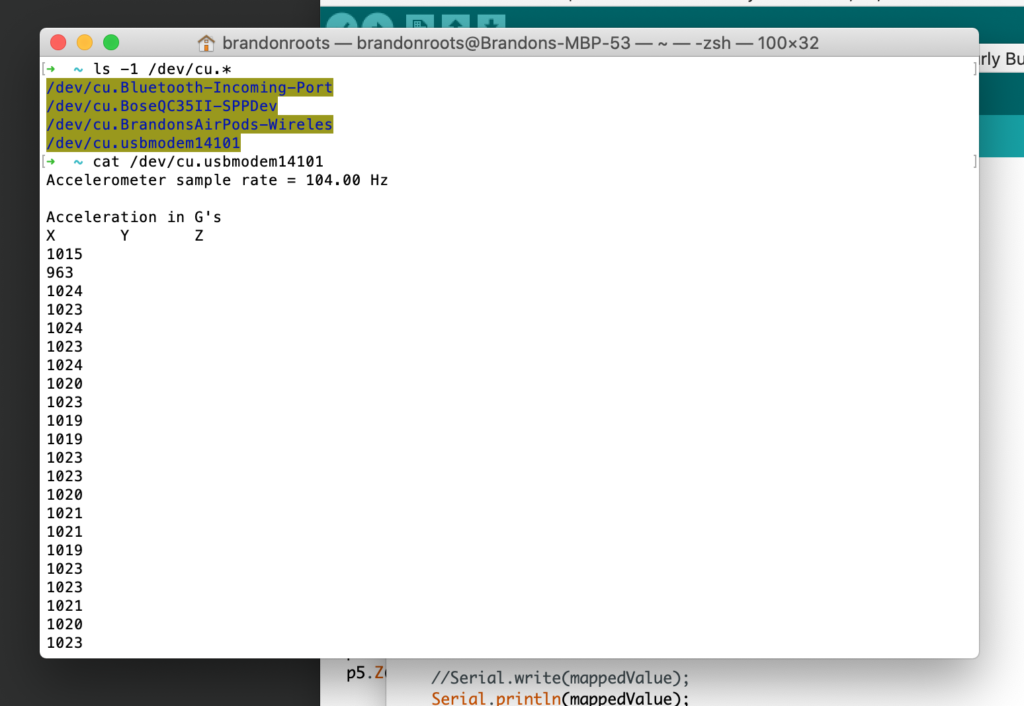
I also tried out “less /dev/cu.usbmodem14101” in terminal, which was meant to stop the window from auto scrolling, but received an error that “/dev/cu.usbmodem14101 is not a regular file (use -f to see it)”.
Getting to work in the terminal this week was great and I enjoyed expanding my skills there! I was also doing work in the terminal this week creating a Twitter Bot running on a Raspberry Pi for Programming A to Z with Daniel Shiffman.
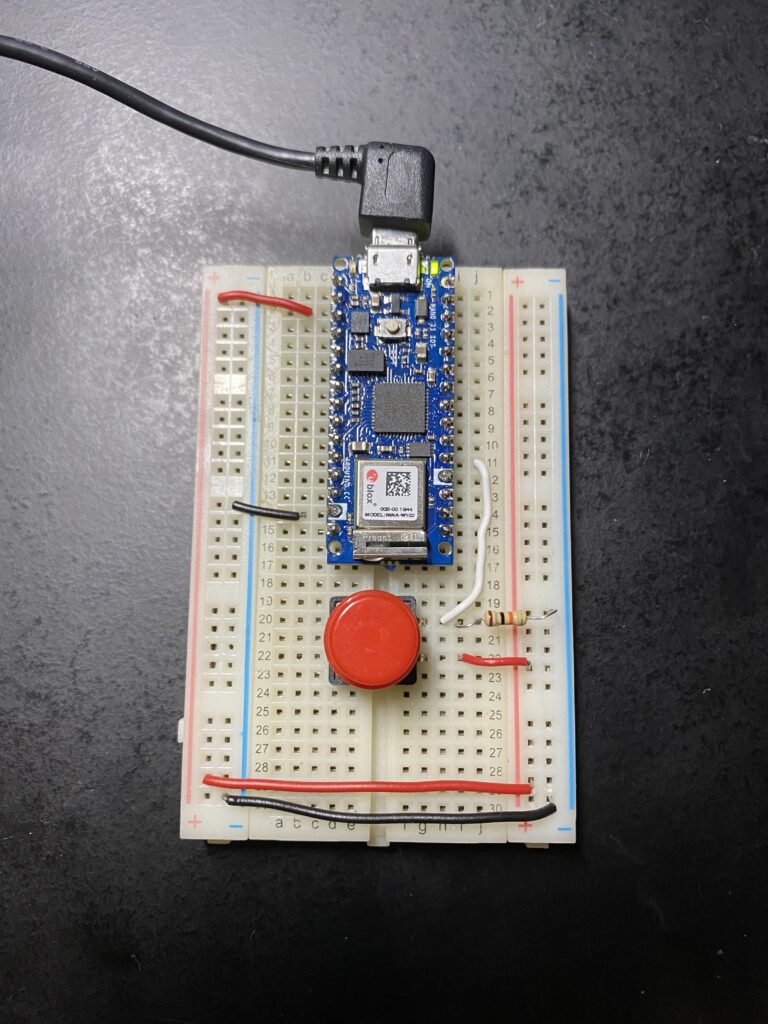
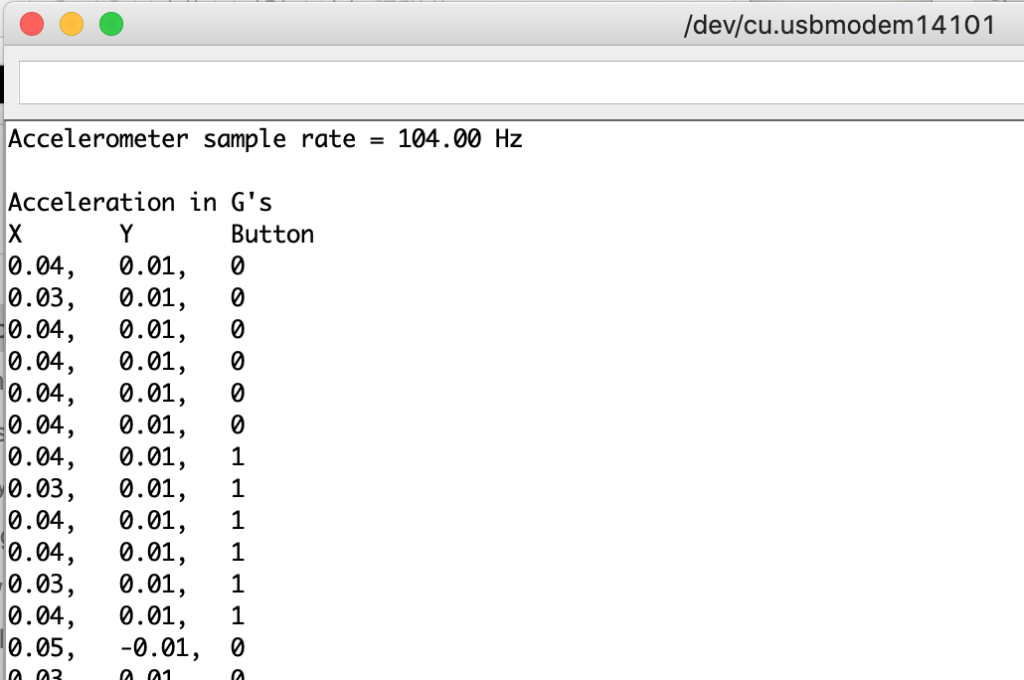
For the next steps I made use of the IMU on the Nano 33 IoT and a push button, wired LOW to ground when in a neutral state and HIGH when pressed 😉. I put together the following Arduino sketch to create a well formatted output of sensor read values to the serial monitor. This sketch builds on the sample sketch “SimpleAccelerometer” by Riccardo Rizzo.
#include <Arduino_LSM6DS3.h>

int buttonValue = 0;
int buttonPin = 2;

void setup() {
  Serial.begin(9600);
  while (!Serial);

  // initialize pin 2 as pushbutton input
  pinMode(buttonPin, INPUT);

  if (!IMU.begin()) {
    Serial.println("Failed to initialize IMU!");

    while (1);
  }

  Serial.print("Accelerometer sample rate = ");
  Serial.print(IMU.accelerationSampleRate());
  Serial.println(" Hz");
  Serial.println();
  Serial.println("Acceleration in G's");
  Serial.println("X\tY\tButton");
}

void loop() {
  float x, y, z;

  buttonValue = digitalRead(buttonPin);

  if (IMU.accelerationAvailable()) {
    IMU.readAcceleration(x, y, z);

    Serial.print(x);
    Serial.print(",\t");
    Serial.print(y);
    Serial.print(",\t");
    Serial.println(buttonValue);
    delay(100);
  }
}
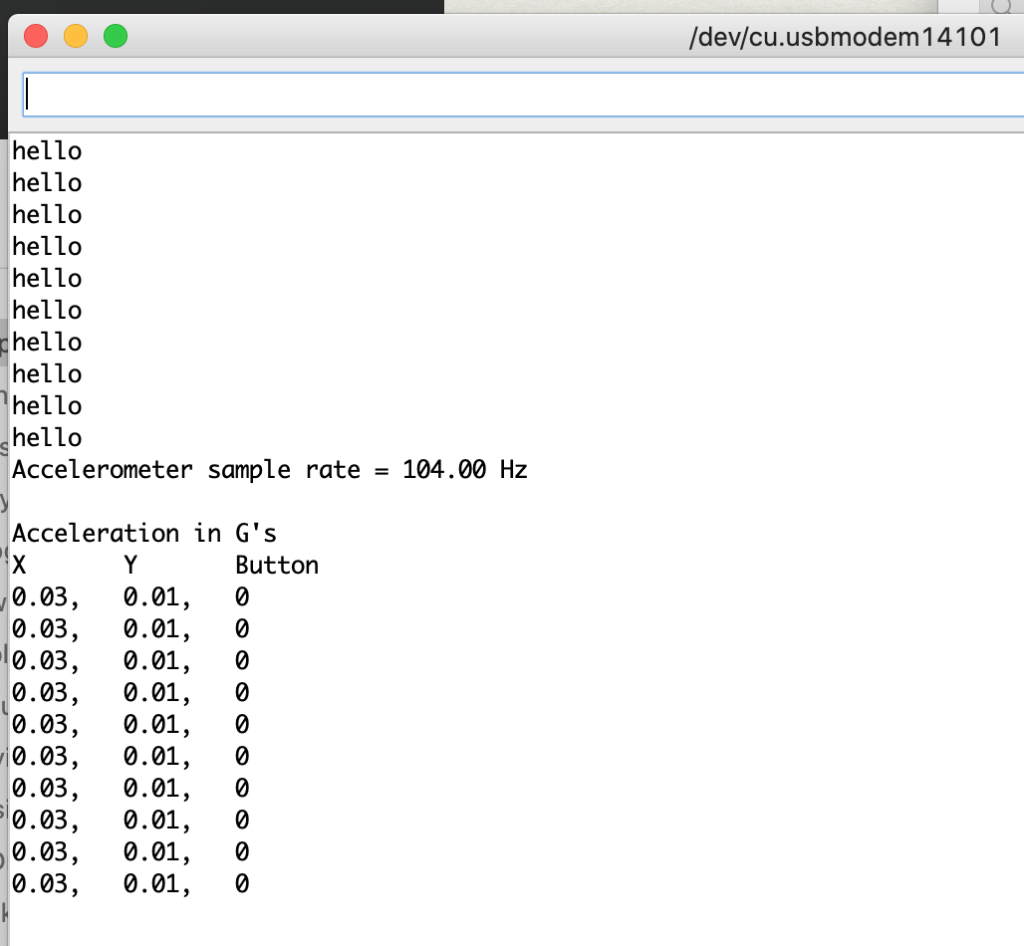
Modifying the code a bit I implemented a handshake into the serial output from the Arduino so that it would only send values when the Serial became available:
#include <Arduino_LSM6DS3.h>

int buttonValue = 0;
int buttonPin = 2;

void setup() {
  Serial.begin(9600);
  while (Serial.available() <= 0) {
     Serial.println("hello"); // send a starting message
     delay(300);              // wait 1/3 second
   }
  while (!Serial);

  // initialize pin 2 as pushbutton input
  pinMode(buttonPin, INPUT);

  if (!IMU.begin()) {
    Serial.println("Failed to initialize IMU!");

    while (1);
  }

  Serial.print("Accelerometer sample rate = ");
  Serial.print(IMU.accelerationSampleRate());
  Serial.println(" Hz");
  Serial.println();
  Serial.println("Acceleration in G's");
  Serial.println("X\tY\tButton");
}

void loop() {
  if (Serial.available()) {
    // read the incoming byte:
    int inByte = Serial.read();

    float x, y, z;

    buttonValue = digitalRead(buttonPin);

    if (IMU.accelerationAvailable()) {
      IMU.readAcceleration(x, y, z);

      Serial.print(x);
      Serial.print(",\t");
      Serial.print(y);
      Serial.print(",\t");
      Serial.println(buttonValue);
      delay(100);
    }
  }
}
Oddly the result here was for the serial readout to the computer to receive several values at once. I imagine this is because the serial port takes some time to turn on and off.
This lab provided quite a bit of information that will take some time to digest. I can certainly see how helpful it will be to consider the format of data over serial especially in the context of developing applications to read that data and making the whole process as efficient as possible.
On to the next lab!


